How to use the Windows Registry Editor
Lawrence Abrams
- April 24, 2023
- Read 125,000 times
The Registry Editor is a powerful application that allows you to access and edit the configuration settings of the Windows operating system.
The Windows Registry is a database containing various settings used by the operating system and installed software applications.
However, it is essential to be careful when using the Registry Editor, as making incorrect changes to the Registry can cause serious problems with your system, including preventing it from booting correctly.
Therefore, before using this guide to modify the Windows Registry, please make a backup of the Registry first.
What is the Windows Registry
The Windows Registry database stores the configuration options and settings for the Windows operating system and software installed on your computer.
The Registry is organized in a hierarchical structure containing keys and values, with five different 'root' keys at the top, as shown below, that serve a particular purpose.
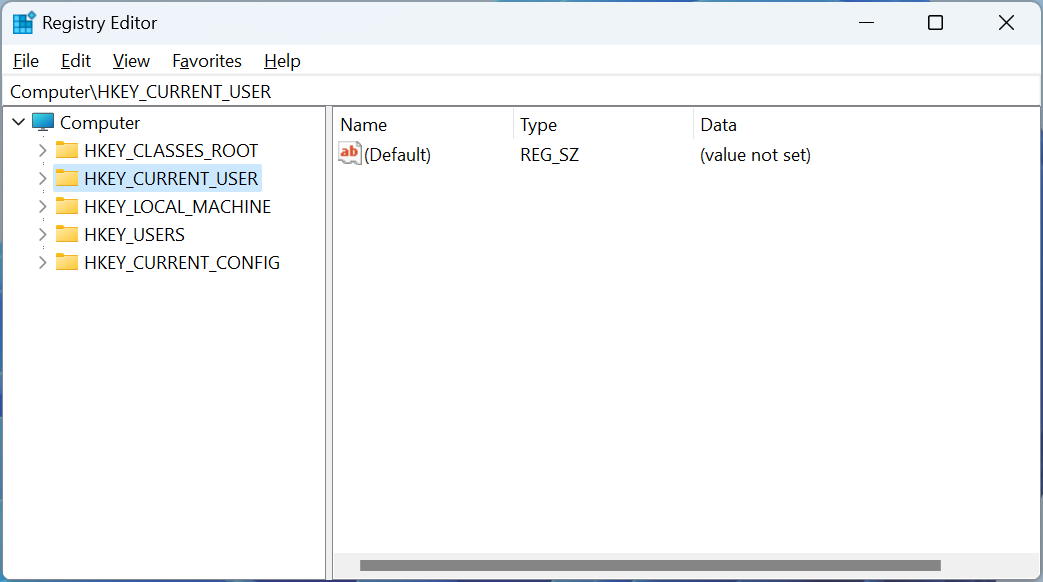
Source: BleepingComputer
The five different root keys in the Windows registry and their purposes are:
-
HKEY_CLASSES_ROOT (HKCR): This key stores information about file associations and OLE object classes.
-
HKEY_CURRENT_USER (HKCU): This key stores information about the current user's settings and a specific user's preferences for various applications.
-
HKEY_LOCAL_MACHINE (HKLM): This key stores information that affects the entire computer, regardless of the logged-in user. These settings are for the computer's hardware, operating system configuration, and software settings that affect all users.
-
HKEY_USERS (HKU): This key stores information about all users who have logged on to the computer.
-
HKEY_CURRENT_CONFIG (HKCC): This key stores information about the current hardware configuration of the computer.
For the most part, you will be modifying keys and values under the HKCU and HKLM root keys.
Registry keys are like folders containing other keys and values used to organize and group related settings.
For example, the HKEY_CURRENT_USER key contains settings for the current user account, such as a user's desktop wallpaper, installed application preferences, and personal settings.
While keys are like folders, Registry values are the files stored within them, containing the specific settings for a particular key. They can have different data types, including text, numbers, and binary data.
There are several different types of registry value data types:
- REG_SZ - A string value that contains text data, such as a username or folder path.
- REG_DWORD - A numeric value that contains a 32-bit integer.
- REG_QWORD - A numeric value that contains a 64-bit integer.
- REG_BINARY - A value that contains binary data, such as an image or sound file.
- REG_MULTI_SZ - A string value that contains multiple strings separated by null characters. This is often used for lists or arrays of values.
Each registry value type is used for a specific purpose, and understanding them can help you better manage and customize your Windows operating system.

Source: BleepingComputer
However, for the most part, when editing the Registry, you will be modifying REG_SZ values for text data and REG_DWORD for numeric data, as they are the most common data types used to stored user-editable data.
Using the Windows Registry Editor
The Windows Registry Editor is a software application created by Microsoft and built into all versions of Windows that allows you to edit the data in the Registry.
The Registry Editor application is located at C:\Windows\regedit.exe, and for the most part, requires administrative privileges to use it properly.
To open the Registry Editor, press the Windows key + R to open the Run dialog box. Next, type "regedit" in the search box and press Enter. If you are shown a prompt asking if you would like to allow the program to make changes, select 'Yes' to continue.
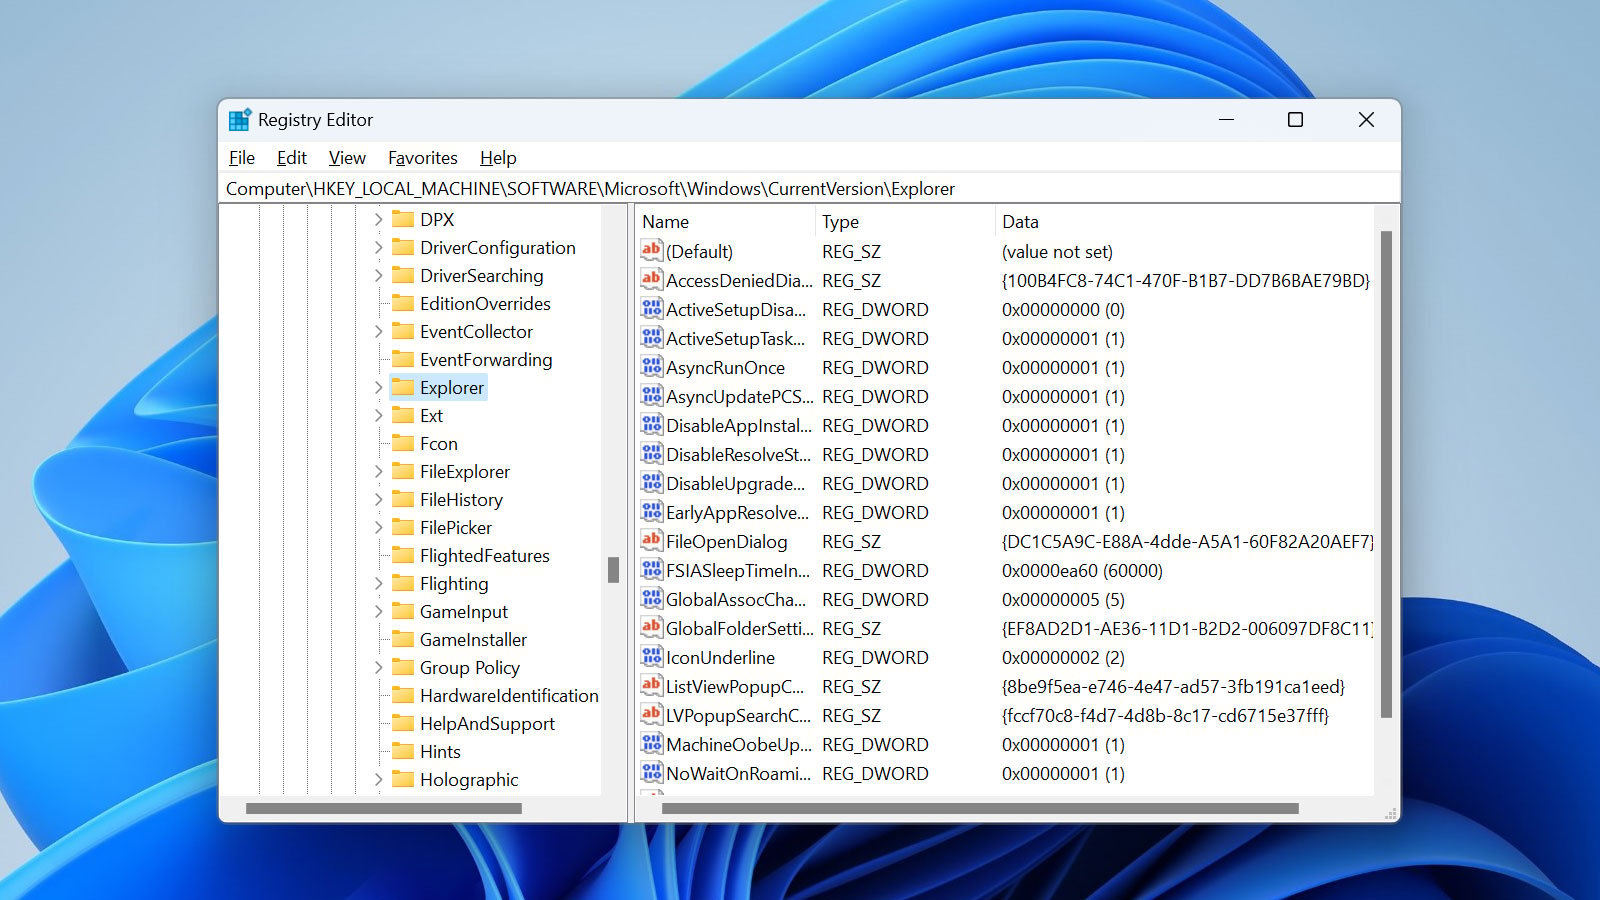
When the Registry Editor is opened, you will see that the window is divided into two panes. The left pane displays a hierarchical tree structure of the Registry's various keys (folders) and subkeys (subfolders).
The right pane displays the values and data associated with the selected key in the left pane.​
Source: BleepingComputer
To open a specific Registry key, use the left pane to navigate to the key you want to edit. Then expand a key and click on the plus sign (+) next to it.
To collapse a key, click the minus sign (-) next to it.
When you click on a key in the left pane, the values stored within it will be shown in the right pane.
Now that we know how to navigate the Windows Registry let's learn how to modify data stored within it.
Create a new Registry key
When configuring new settings in the Windows Registry, you may need to create a key at some point.
Use these steps to create a new key in the Registry:
- Right-click on the key you want to create a new subkey under in the left pane.
- Select New -> Key.
- Enter a name for the new key and press Enter.
Creating a Registry value
As Registry values contain the data that configure how an application or Windows works, it is common to need to create Registry values.
Use these steps to create a Registry value:
-
Navigate to the key where you want to create the value.
-
Right-click on the key and select "New" and then select the type of value you want to create. The kinds of values you can make are explained in the previous section.
-
Give the new value a name by typing it in the box that appears.
-
Double-click on the new value to edit its data.
-
Enter the desired value data and click OK.
Renaming Registry key
Sometimes you may need to rename a Registry value, such as when introducing a typo.
To rename a Registry key, please follow these steps:
- Navigate to the key you want to rename.
- Right-click the key and select Rename.
- Enter the new name for the key in the editable field.
- Click anywhere to save the changes.
Renaming a Registry value
Sometimes you may need to rename a Registry value, such as when introducing a typo.
To rename a Registry value, please follow these steps:
- Right-click the value you want to rename in the right pane and select Rename.
- Enter the new name for the key in the editable field.
- Click anywhere to save the changes.
Editing Registry value data
To make changes to a Registry value, follow these steps:
- Double-click on the value you want to edit in the right pane.
- The Edit dialog box will appear.
- Enter the new value for the key in the 'Value data' field.
- Click OK to save your changes.
Export a Registry key
It is possible to export Registry keys and all their subkeys and values to a registry file.
A registry file ends with .reg, and when you double-click on one in Windows, it will import the data back into the Registry. Exporting a registry key helps create a backup before you make changes to the Registry.
- Right-click on the key you want to export in the left pane.
- Select Export.
- Choose a location to save the exported key and give it a name.
- Click Save.
Import a Registry key
If you had previously exported a key, you could import its data into the Registry by importing the file using these steps:
- Click on File -> Import.
- Navigate to the location where you saved the exported key.
- Select the key file and click Open.
Delete a Registry key
If you need to delete a Registry key, use the following steps.
- Right-click on the key you want to delete in the left pane.
- Select 'Delete' from the context menu.
- Confirm that you want to delete the key by clicking Yes.
Note: If you delete a key, all subkeys and values underneath them will be deleted too!
Note 2: You should only delete a registry key if you know it will not cause issues with your computer!
Delete a Registry value
If you need to delete a Registry value, use the following steps.
- Right-click on the value you want to delete in the right pane.
- Select 'Delete' from the context menu.
- Confirm that you want to delete the value by clicking Yes.
Note: You should only delete a registry value if you know it will not cause issues with your computer
When done using the Registry Editor, you can close it by clicking on the X in the Window or clicking on File > Exit.
With these steps, you should now be able to use the Windows Registry Editor to navigate and edit the Registry.
However, it is vital to be careful when making changes to the Registry, as incorrect changes can cause severe problems with your system.
It is always recommended to create a backup of your Registry before making any changes.

