How to flush DNS cache on Windows 11
Are you having problems loading a website or pinging an online service by its domain name? You probably need to flush the DNS cache, and here's how.
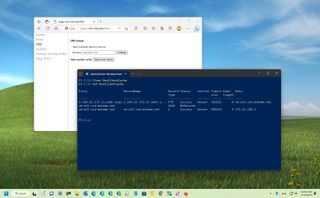
On Windows 11, when a particular website isn't loading, an app that requires access to the internet is not working or using networking tools like "ping" or "nslookup" show the wrong destination IP address in the result, it's probably a problem with the local Domain Name System (DNS) cache. In this guide, you will learn how to fix this problem.
When browsing the web or using an app that depends on an internet connection, the Windows 11 networking stack saves a copy of each domain name to an IP address translation from the DNS feature in the local resolver cache to make subsequent connections faster.
The caveat with this process is that sometimes the DNS cache can stop working for a number of reasons, preventing websites and apps from loading correctly and this is when flushing the DNS cache records from the system can help since you will be technically resetting the cache and starting over with a new database.
If you're dealing with DNS-related issues, Windows 11 includes at least two ways to clear the cache using Command Prompt and PowerShell. In addition, apps like Microsoft Edge, Google Chrome, and Mozilla Firefox also feature tools to flush these networking records to resolve the problem.
This how-to guide will walk you through the different ways you can use to clear the DNS cache on Windows 11.
How to flush DNS cache from Command Prompt on Windows 11
- Open Start.
- Search for Command Prompt, right-click the top result, and select the Run as administrator option.
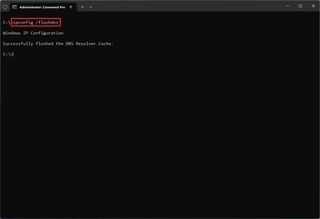
- Type the following command to flush the DNS cache on Windows 11 and press Enter: ipconfig /flushdns
- (Optional) Type the following command to view the cached records from the local DNS and press Enter: ipconfig /displaydns
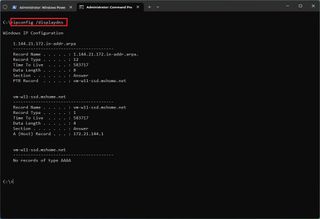
Once you complete the steps, the next time the system or an application tries to access the network, a new DNS lookup process will occur to cache the information again.
How to flush DNS cache from PowerShell on Windows 11
To flush the DNS records with PowerShell commands, use these steps:
Get the Windows Central Newsletter
All the latest news, reviews, and guides for Windows and Xbox diehards.
- Open Start.
- Search for PowerShell, right-click the top result, and select the Run as administrator option.
- Type the following command to clear the DNS cache on Windows 11 and press Enter: Clear-DnsClientCache

- (Optional) Type the following command to view the cached records from the local DNS and press Enter: Get-DnsClientCache
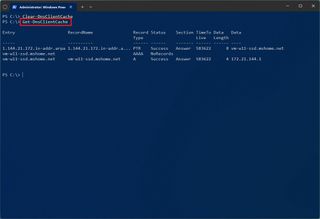
After you complete the steps, the PowerShell command will clear and reset the DNS records cached on the device.
How to flush DNS cache from browser on Windows 11
On Windows 11, the most popular browsers (such as Microsoft Edge, Google Chrome, and Mozilla Firefox) also include an option to clear the DNS cache on Windows 11.
Edge or Chrome
To clear the DNS cache from Edge or Chrome, use these steps:
- Open Edge or Chrome.
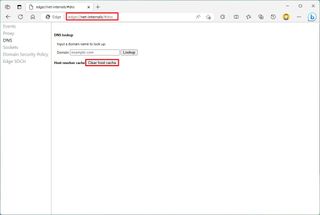
- Type the following path in the address bar and press Enter: chrome://net-internals/#dns
- On the "DNS" page, click the "Clear host cache" button for the "Host resolver cache" setting.
Firefox
To clear the DNS cache from Firefox, use these steps:
- Open Firefox.
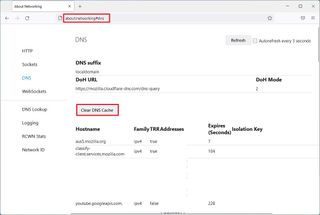
- Type the following path in the address bar and press Enter: about:networking#dns
- On the "DNS" page, click the "Clear DNS cache" button.
Once you complete the steps, similar to using Command Prompt and PowerShell, the web browser will flush the DNS cache to allow websites and other services to work properly again.
This guide focuses on Windows 11, but the command tools, as well as the networking features on Edge, Chrome, and Firefox, are available on Windows 10.
More resources
For more helpful articles, coverage, and answers to common questions about Windows 10 and Windows 11, visit the following resources:
Mauro Huculak is technical writer for WindowsCentral.com. His primary focus is to write comprehensive how-tos to help users get the most out of Windows 10 and its many related technologies. He has an IT background with professional certifications from Microsoft, Cisco, and CompTIA, and he's a recognized member of the Microsoft MVP community.

