The Windows secure logon feature has been around for a while and its purpose can be easily figured out by simply reading its name.
With secure logon, Windows computers can make the login process more secure, basically by adding an extra step when users log into a specific computer.
This feature requires every user to press Ctrl + Alt + Del before providing their usernames and passwords, and the extra step is supposed to block malicious files like malware from recording the sensitive data.
Secure logon isn’t enabled in Windows 10, but turning on the feature only comes down to a few clicks. And just like the other versions, Windows 10 October 2018 Update (version 1809) supports it too, and the process to activate secure logon is pretty much the same.
Before anything else, keep in mind that an administrator account is required because otherwise, you won’t be allowed to make changes to your PC.
Enable Secure Logon using Control Panel
As you probably heard, Microsoft is in the process of killing off the classic Control Panel by migrating all options to the Settings app in Windows 10.
This means that at some point, Control Panel would go dark, and all the configuration screens will be available via Settings. For the time being, however, this remains work in progress, and enabling secure logon hasn’t yet migrated to Settings.
You can thus enable this feature from the Control Panel, and the easiest and fastest way to reach the desire configuration screen is by simply typing netplwiz in the Start menu or the run dialog that shows up when pressing the Windows key + R.
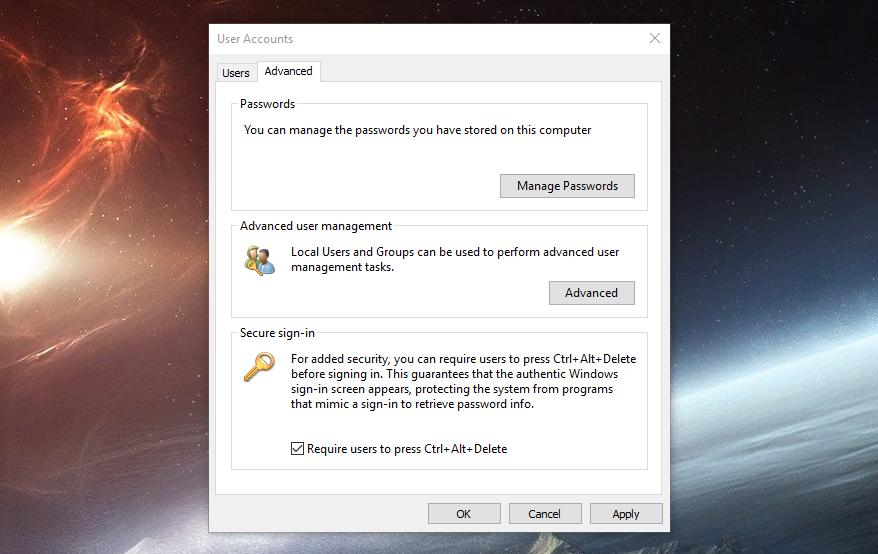
This should technically open the User Accounts configuration UI, which lets you manage passwords, perform advanced user management, and change settings for each user.
What you need to do is click on the Advanced tab and in the lower part of the screen, there’s a section called Secure sign-in. Check the option that reads Require users to press Ctrl + Alt + Delete, click Apply, and then you’re good to go.
Enable Secure Logon using Local Security Policy
As an alternative, you can also enable the secure logon feature using the Local Security Policy. This involves more steps and may not necessarily be the most convenient solution for beginners.
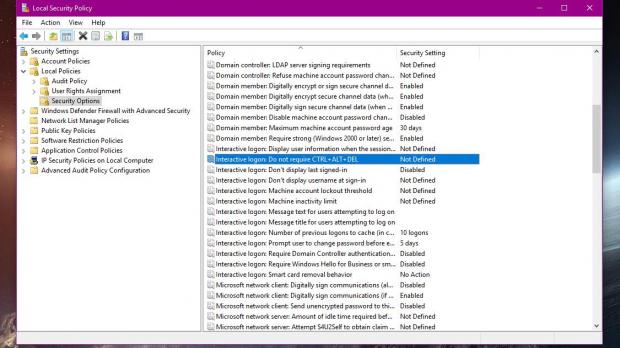
To launch the Local Security Policy, type secpol.msc in the Start menu or in Windows key +R. Navigate to the following path:
Security Settings > Local Policies > Security Options
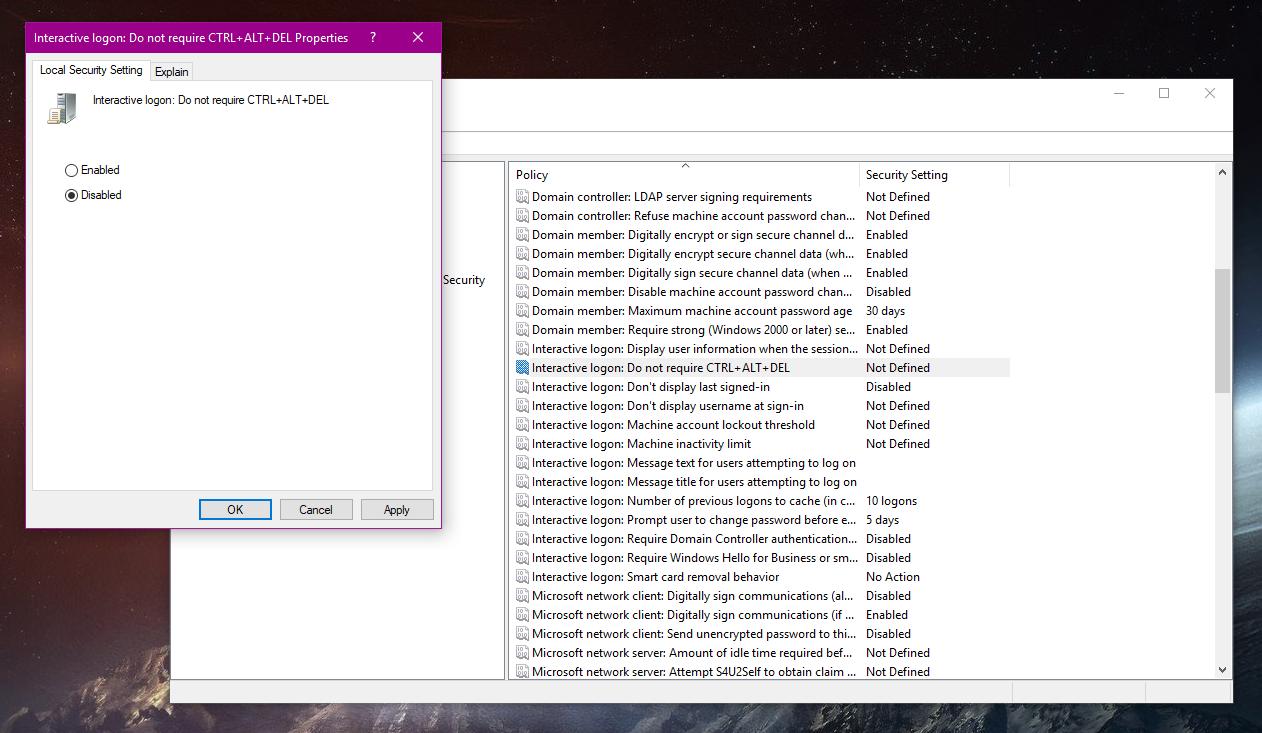
In the right pane, you must look for a policy called “Interactive logon: Do not require CTRL + ALT + DEL.”
By default, this policy is set to Not Defined, so you need to either enable or disable it based on your preferences. To require the Ctrl + Alt + Delete extra step, the policy must be Disabled. The description of the policy explains all settings:
“If this policy is enabled on a computer, a user is not required to press CTRL+ALT+DEL to log on. Not having to press CTRL+ALT+DEL leaves users susceptible to attacks that attempt to intercept the users' passwords. Requiring CTRL+ALT+DEL before users log on ensures that users are communicating by means of a trusted path when entering their passwords.”
Once you select the option you want, just click the Apply button and you can close all windows. If you want to return to the original settings at a later time, just follow the same steps, but this time toggle to the other option left in the policy (if you switched to disabled in order to turn on the extra step, you need to select enabled to activate the policy and thus turn off secure logon).

 14 DAY TRIAL //


